Window boards, often referred to as window sills, are a subtle yet critical feature in home design. They don’t just add visual appeal—they also protect your interior walls from water damage and enhance the overall aesthetic of a room. Installing and maintaining a window board might seem intimidating, but with the right steps, you can achieve a professional, flawless finish. Here’s a step-by-step guide that combines techniques, best practices, and expert insights to help you master the art of window board installation and care.
Why the Right Window Board Matters
Before we jump into the installation process, let’s take a moment to understand why window boards are essential. A well-installed and maintained window board serves more than just an aesthetic purpose; it’s also functional.
- Water Protection: Window boards help prevent water from seeping into your walls and causing structural damage.
- Thermal Insulation: They can contribute to better insulation by acting as a barrier to reduce drafts.
- Aesthetic Appeal: Window boards can enhance a room’s personality, particularly when designed with materials that complement the rest of the interior.
Now that we know their importance, let’s move on to achieving that “perfect finish.”
Step 1: Choose the Right Materials
When selecting your window board, consider both functionality and design. You want a material that’s durable, looks great, and fits within your space’s overall theme. Common options include:
- Wood (e.g., oak or pine): Traditional and timeless, ideal for warm and natural interiors.
- MDF (Medium-Density Fiberboard): Affordable and easy to customize, often used for homes with contemporary designs.
- Stone or Marble: Adds a luxurious touch and is perfect for modern or upscale spaces.
- PVC: Water-resistant and low-maintenance, commonly used in bathrooms or kitchens.
Pro Tip: Always measure your windows carefully before purchasing the materials. Ensure your window board will extend slightly beyond the wall edge for a cohesive look and drip protection.
Step 2: Installation Made Simple
Tools You’ll Need
Before starting, collect the following tools and materials to streamline the process:
- Tape measure
- Carpenter’s saw
- Sandpaper (medium and fine grit)
- Adhesive (construction-grade recommended)
- Spirit level
- Caulk and caulking gun
A Step-by-Step Installation Guide
- Measure and Cut
Start by measuring the width and depth of your window recess. Use a carpenter’s saw to cut the board to size. Smooth any rough edges with sandpaper to ensure a clean, professional finish.
- Prepare the Surface
Clean the window recess thoroughly. Wipe away dust or debris to allow strong adhesion between the window board and the surface.
- Apply Adhesive
Apply construction adhesive evenly to the recess where the board will sit. Focus on corners and edges for a sturdy hold.
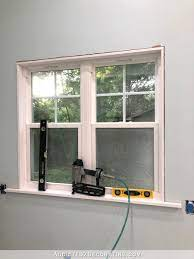
- Position the Window Board
Carefully place the window board into position. Use a spirit level to ensure it’s completely flat and adjust accordingly before the adhesive sets.
- Seal the Gaps
Use caulk to seal any gaps between the wall and the board for a smooth, polished transition. This step also prevents moisture buildup.
- Finishing Touches
If you’re using wood or MDF, apply paint, stain, or varnish for added protection and a tailored finish. Stone and PVC boards might only require a light polish to enhance their natural shine.
Step 3: Maintaining Your Window Board
Once installed, proper maintenance is key to keeping your window board in top condition. Follow these tips to extend its lifespan and preserve its appearance.
Cleaning
- Wood Boards: Dust regularly and wipe clean with a damp cloth. Avoid abrasive cleaners that can damage the finish.
- Stone Boards: Use pH-neutral cleaning products to avoid discoloration or erosion.
- PVC Boards: Simply clean with water and a mild detergent for a spotless and low-effort result.
Periodic Checks
Inspect your window boards every few months for signs of wear, warping, or damage. Pay attention to any splits in wooden boards or cracks in the caulking, as these can compromise functionality.
Repainting or Re-staining
For wooden or MDF boards, reapply paint, varnish, or stain every few years to maintain a fresh appearance and enhance durability.
Moisture Prevention
Keep the area near your window board dry at all times. Check for leaks around the window since prolonged exposure to moisture can cause damage, especially to wooden boards.
Achieve Flawless Window Boards
Installing and maintaining a window board doesn’t have to be a daunting task. By following this guide, you’ll have the confidence to create a stunning finish that stands the test of time. Whether it’s wood, marble, or PVC, each material can deliver a unique charm to your interiors while providing essential protection against water and drafts.

